Building a pool can be quite a complex and delicate performance to carry out. Therefore, multiple pool construction phases exist when someone wants a residential oasis. From the initial 3-D design all the way to the finished product, there are many other steps and details in the pool building process. The time frame to complete each pool construction phase has a variety of factors that can impact how quickly each phase will be completed. Some common factors that may lead to an increased time for completion are rain/water, building permits, HOA approvals, relocating utility lines, etc.
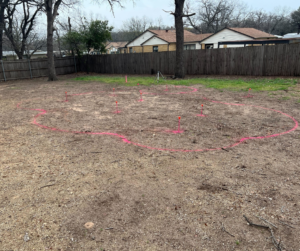
Measuring, Marking, and Digging
Before the big “Dig” day, our designer works to create a design that is truly one of a kind. Emerald does not work off of templates or cookie-cutter plans. Once a client approves the layout of their dream backyard, the next step is for the company to request building permits if needed. Acquiring permits can take a long or short time, depending on the city you are building in and the time of the year. To determine the type of permits you need, click here to read our article.
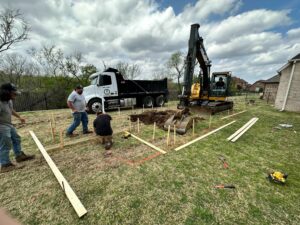
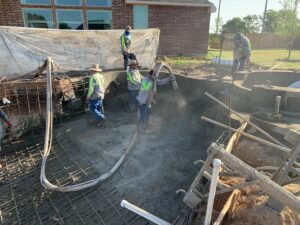
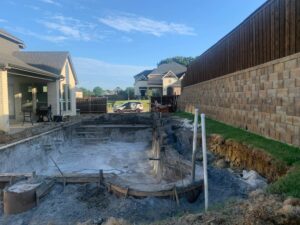
The first step in the pool building process is to measure and mark the area where the swimming pool goes according to our designed layout. After laying out the pool is verified, we proceed to start digging the main area of the pool. Some surprises can arise during this first phase, such as large rocks, old utility lines, or water tables, depending on the specific area/yard. Once the hole has been dug, it’s time to compact the soil to improve the base and prepare it for the next step.
Installing the Steel Structure
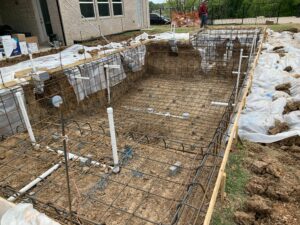
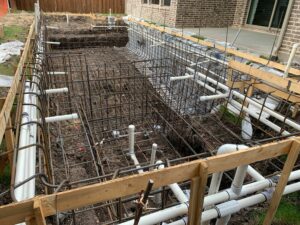
Once the hole has been dug, we quickly create the pool’s steel structure or “belly and walls”. The steel structure will provide a better/stronger shape to the walls and the floor of the pool. Here at Emerald, we use ½ inch steel and 10-inch centers to provide a stronger cage within your pool.
Installing the Plumbing and Setting Equipment
Once the steel is completed it is time to set up the pipes and wires to make everything function properly. The plumbing system includes making space for skimmers, drainage, and placing the pipes. The next step would be to place the filtering and heating systems in a specified area. There should be at least one water pump, a water filter, and a pool heater or heat pump if contracted to include. It is crucial to have an experienced pool builder to install the equipment properly.
Gunite
Once the steel structure, electricity and plumbing are in place, then it’s time to “shoot” the gunite. Using a large hose, the gunite goes on the structure’s walls and floors. While it’s wet, we will smooth the gunite and shape it in areas like steps or curves so that the pool will have real consistency and the ultimate strength for the next step.
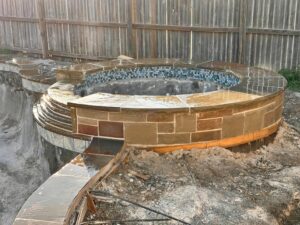
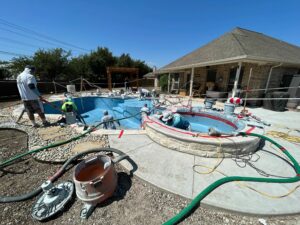
Tile and Coping
After the gunite has cured, we can add your selected tile and coping to your pool. Some masonry can be quite heavy so it is particularly important to give your gunite plenty of time to cure before applying the extra weight. Coping is the capstone installed around the perimeter of your pool. There are many different coping options to choose from (Check out our tile and coping options here)

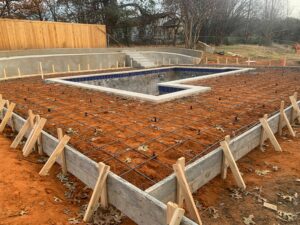
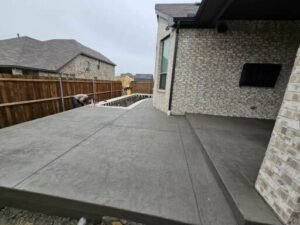
Decking
Once your tile and coping have been set in place and leveled, we will begin to get your deck ready for pouring or laying. Depending on the type of deck you wish to add to your oasis, this process will differ. Concrete pours vs pavers vs mondo-leave outs with turf can all be a completely different process that Emerald will walk you through.
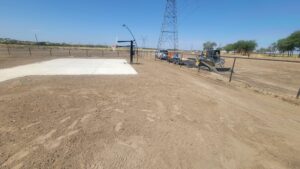
Grade & Clean Up
We will come in and get things cleaned up and smoothed out prior to the final steps. This usually takes about ½-1 full day to complete depending on the amount of dirt work, size of pool and elevation.
Plaster
Plaster is the last step in the construction of your pool. The plaster gives your pool’s structure a waterproof finish to keep the water in the pool and give your pool a unique look that is just right for you. There are many different plaster options to choose from (Check out our plaster options here)
Pool School
Start up will occur first followed by pool school several days later. After the pool is filled with water, we will send one of our expert pool care technicians out to visit you at your home and teach you about the proper operation of your new pool. Once your swimming pool is ready and functioning correctly, we can proceed with your sprinkler reroute, desired landscaping and decorating!
Now that we have brought you the phases of the construction of a swimming pool, keep in mind that an oasis is not only for a large property; it has the versatility to fit in any space with the right design that is fitting to your home and aesthetic. Start the journey of creating your dream backyard, click the link here!
Request a Free Consultation
Find out more about the reality of making your backyard a relaxing retreat! Contact us today to schedule a free consultation to learn more.